Are you looking for The Stitch -Resist Shibori Process then check out this post to know more. Shibori comes from the Japanese word shiboru, meaning ‘to wring, squeeze or press’. It refers to a variety of ways of embellishing textiles by shaping cloth and securing it before dying. Although shibori is used to designate a particular group of resist-dyed textiles, the word emphasizes the action performed on cloth, the process of manipulating fabric.
Rather than treating cloth as a two-dimensional surface, with shibori it is given a three-dimensional form by folding, crumpling, stitching, plaiting, or plucking and twisting. Cloth shaped by these methods is secured in a number of ways, such as binding and knotting.
Stitch Resist Shibori Process
It is the pliancy of textiles and the potential for creating a multitude of shape-resisted designs that the Japanese concept of shibori recognizes and explores. The shibori family of techniques includes numerous resist processes practiced throughout the world. Here, we will map out the process as it is done in India.
In most languages shibori has no term that encompasses all the various techniques; nor is there English terminology for individual methods, which often have been incorrectly lumped together as ‘tie-and-dye’.
Three terms for separate shibori methods have come into international usage: plangi, a Malay- Indonesian word for the process of gathering and binding cloth; bandhini, an Indian term for the same process; and tritik, a Malay-Indonesian word for stitch-resist. However, these three terms represent only two of the major shibori techniques.
The special characteristic of shibori resist is a soft- or blurry-edged pattern. The effect is quite different from the sharp-edged resist obtained with stencil, paste and wax. With shibori the dyer works in concert with the materials, not in an effort to overcome their limitations, but to allow them full expression. And an element of the unexpected is always present.
In India shibori was first introduced by literature Nobel laureate Rabindranath Tagore, famed for his interest in reviving and reinventing the traditional arts and crafts of the country apart from his expertise in Bengali literature.
Regions
Shibori is practiced in the urban villages of Delhi, craft clusters of Rajasthan and Bhuj in Gujarat.
Most artisans use the rope-tied technique of shibori wherein a rope is tied to a bundle of fabric. Only the area that does not have the rope gets colored, while parts under it resists. This method of tie-and-dye is a coarser variant of the shibori process that has been explained above.
Tools
Needle,
Dyeing pots
Raw Material
Thread, unbleached cotton cloth and colored natural dyes.
The Process
The shibori process has four steps, consisting of design, stitching, tightening and finally dying.
Design
As with any creative process, shibori begins with the conceptualization of the design. Though there are certain linear and non-linear patterns that form the basic motif of a shibori design, the process does provide the designer with an unlimited array of combinations within the basic framework.
After the design has been structured on paper or on the computer, it is transferred/ copied on to a thin sheet of plastic. The plastic sheet is then passed through a sewing machine along the outline of the design and is stitched without thread.
A stencil made in this manner contains tiny holes along the design. Laying the stencil on natural unbleached cloth, a duster dipped in kerosene and silver solution is pressed along it. The solution seeps through the tiny holes marking the design on the cloth.
In the kerosene and silver solution used the former acts as a binder. The kerosene evaporates from the cloth, while the silver stain can be easily removed by washing the cloth.
Stitching
The next level of the process is stitching. With the marking done on the fabric, a running stitch (manually with needle and thread) is made along the design.
At the two ends of the thread a small piece of cloth is attached that allow the thread to be pulled from both the ends, thus crushing the fabric.
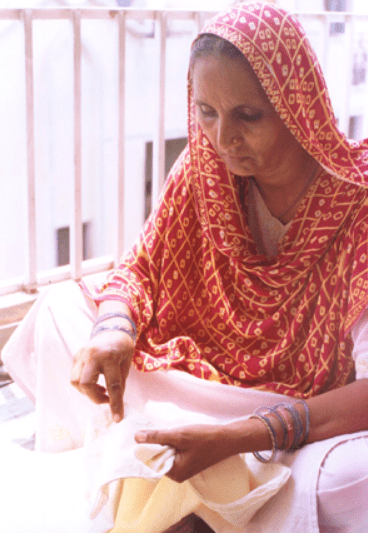
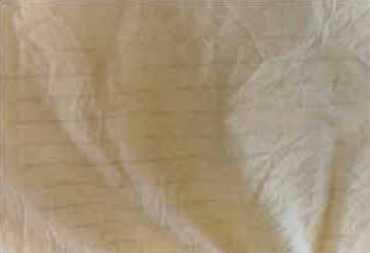
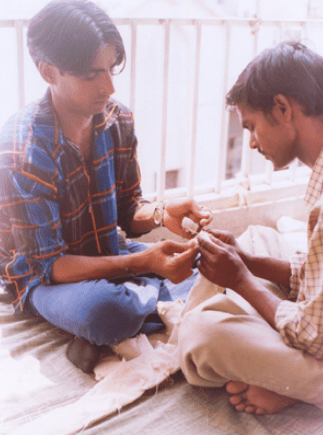
An artisan stitches the design.
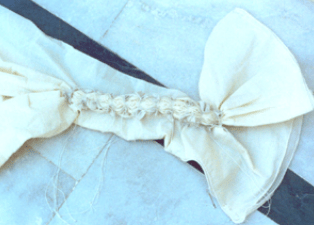
The fabric after the stitch has been undertaken.
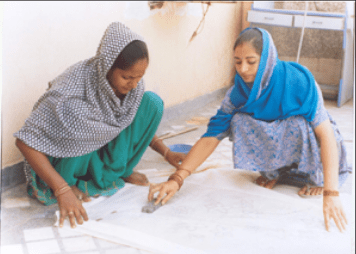
Tightening
The shibori process now progresses to the most important part—the tightening. Here, two people are required, one holding the cloth, the other pulling the two ends of the thread in the opposite direction. The cloth along the thread gets compressed and a knot is then made to bind the cloth and not allow the color to seep into it (the area compressed by the knot) at the time of dyeing.
The right amount of pressure is required to tie the knot as a lose loop that can allow the color to percolate into the knot where the color is not required. It is because the entire area on the fabric gets colored other than spot within the knot that the process is referred to as a stitch-resist dying technique.
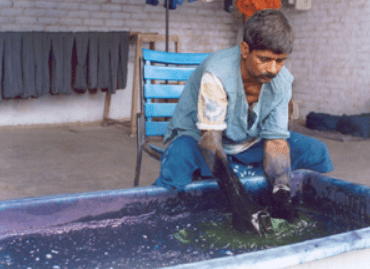
Dyeing
With the tightening done, the fabric is soaked in a mild soap solution for some time. Thereafter, it is dipped in a bath for dyeing.
For preparing the bath, the material to liquid ratio (MLR) should be maintained in the region of 1:20. For example, 1 kg of fabric or yarn requires 20 l of water. Similarly, for the concentration of color explained below, a 5per cent description refers to 50 g of color (or any other chemical) to be dissolved in 20 l of water for 1 kg of fabric or yarn. Apart from indigo, all the other colors are ‘hot processes’, that is, they require water to be mildly heated while the dyeing process is on. For all the colors described below, the cloth/yarn is to be kept in the bath for 45 minutes.
In natural dyeing, in order to increase the absorption of color as well as for fastness, the concentration of dye should be increased incrementally. For example, once the 5 per cent indigo bath is ready and the fabric/yarn has been immersed in it, if a darker shade is required then more indigo should be added slowly (1-2 per cent) till the desired shade is achieved.
The process of natural dyeing for a few popular colors of shibori is explained. For indigo, the dry cake is grinded into fine powder and mixed with water. Sodium hydroxide and sodium hydro sulfide are added to the bath. Indigo powder, sodium hydroxide and sodium hydro sulfide are dissolved in the ratio of 1:1:4. The latter two are required to introduce hydrogen into the solution so that the necessary chemical reduction can take place (chemical reduction can happen either by the introduction of hydrogen or by the extraction of oxygen; in this process hydrogen is being introduced).
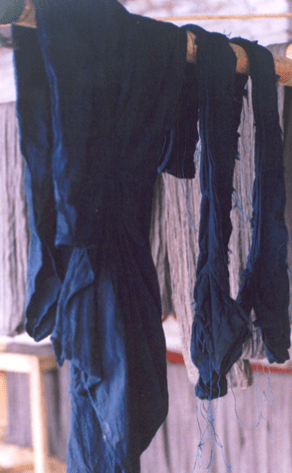
Once the indigo bath is ready, the shibori is submerged in it for 45 minutes. Colored pale yellow, it is allowed to dry in the open that oxidizes the dye and slowly changes the color to green and then blue. Once the cloth is immersed, it should remain below the surface for the entire period (of, say, 45 minutes), otherwise the dye oxidizes in those areas where it comes in contact with air, leading to patches of different shades.
For gray, congo (harora) (5 per cent) and ferrous sulfate (2 per cent) is mixed in water. Yellow requires alum (fitkar) and congo at 8 and 10 per cent respectively. Brown color requires mordant alofix at 3.5 per cent and beach bundat 8 per cent to be mixed in water and heated for 30 minutes.
Thereafter, 2 per cent copper sulfate is added and heated for 15 minutes, followed by 5 per cent sodium phosphate for 15 minutes. Finally, acetic acid is added to make the solution acidic (pH 4). For the color green, the cloth is first dipped in the yellow bath followed by an immersion in the indigo bath. Red requires mordant alofix at 3.5 per cent, raenem at 8 per cent and fitkari at 2 per cent to be mixed in water.
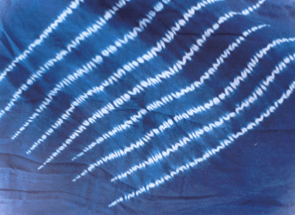
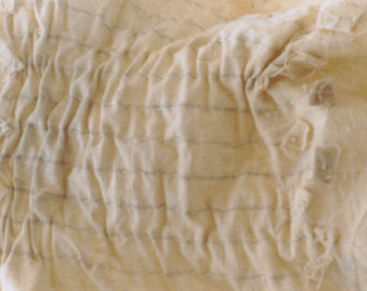
The design after the fabric has dried and the stitched removed.
An Example of Two-color Shibori Process
The design is transferred on a natural unbleached fabric and the stitching is completed. In the process of two-shade indigo dyeing, the cloth is first dipped into a vat containing the lighter shade of indigo. After the cloth has dried, tightening is done. It is then submerged in a vessel containing the darker shade of indigo. The area around the tightened thread gets crinkled and compressed and does not allow the color to leak in, hence allowing that portion to maintain the original lighter shade.
According to shibori, the closer the stitches that are tightened into a knot, the larger will be the area where the color does not seep in. The fabric resists the dye along the stitch.
Identifying Authentic Shibori
All fabric that has been processed using the shibori technique will bear pinpricks where the design was stitched in. Held against light, the minute holes made by the needle should be visible. However, normal dyed cloth passed on as authentic shibori has dyed dots representing the stitch marks. As they are printed, they do not allow light to pass through.
Other Techniques
Willow shibori, fold shibori and pole-wrap shibori are other techniques used. In willow shibori, the fabric is wound around a willow (basically a drum of a large diameter) and then compressed from both the ends. The fabric gets scrunched, and when dipped in a dye bath only the top gets colored, while the inner layer of the fabric remains bereft of it.
For pole-wrap shibori, too, the same process is followed except thinner fabrics are used on the pole as it has a smaller diameter. For fold shibori, the cloth is folded in multiple layers and then stitched tightly. Where ever the stitch is present, the cloth does not get colored. Variants peculiar to India are bandhani and laharia.
